
Step-by-step setup
no Firebase experience needed.
The whole path from the download to your app on a phone, one small step at a time, with what you should see after each step. If you have never used a terminal or Firebase, start here. Plan an afternoon.
01Before you start
You will copy and paste a few commands. That cannot be avoided: Firebase installs the backend only from a terminal. You never have to write code. Each command is in a dark box with a Copy button; paste it, press Enter, and compare what you see with the "You should see" line.
- What a terminal is. On a Mac: open Terminal (Applications → Utilities). On Windows: open PowerShell from the Start menu. Commands run in a folder;
cd folder-namemoves into a folder. - Open a terminal in a folder. Mac: in Finder, right-click the folder → Services → New Terminal at Folder. Windows: in File Explorer, open the folder, click the address bar, type
powershell, press Enter. - Keep a notes file for your project id, the API address and where you saved your keys. Never paste keys or passwords into a support message.
The parts and how they connect are on one picture in Architecture. What you will pay for is in Services and costs.
02Part 1 · Install the tools
- Node.js 22Download the "LTS" installer for version 22 from nodejs.org and run it.
- Firebase CLIIn a terminal:
On a Mac, if it says "permission denied", putnpm install -g firebase-toolssudoin front and enter your Mac password. - FlutterFollow the official guide at docs.flutter.dev for your system, with Android Studio (and Xcode on a Mac for iOS).
- Check
You should see:node --version firebase --version flutter --versionv22.…, a Firebase CLI version of 14 or newer, and Flutter 3.41 or newer. Exact versions: Requirements.
03Part 2 · Create your Firebase project
All of this happens in your web browser. Google renames buttons now and then; if a label differs a little, look for the closest match.
- Create the projectOpen console.firebase.google.com with your Google account and create a new project. Pick any name. Google Analytics is not needed. Write down the project id it shows (for example
my-tracker-1a2b3): you will need it many times. - Switch to the Blaze planIn the project, open the plan or billing setting (bottom of the left menu) and upgrade to Blaze (pay as you go). It asks for a billing account. This is required: Cloud Functions, their schedules and calls to CoinGecko only run on Blaze. Then, in Google Cloud Billing, create a budget alert so you get an e-mail if spending passes an amount you choose.
- Turn on AuthenticationLeft menu → Build → Authentication → Get started. Under Sign-in method, enable Anonymous. (Google, Apple and e-mail are optional; you can add them later.)
- Create the databaseLeft menu → Build → Firestore Database → Create database. Choose a location near your users (it cannot be changed later) and continue. The security rules it suggests do not matter: the next part replaces them with the package's rules.
You should see: the Firestore page with an empty database, and "Anonymous" enabled in Authentication.
04Part 3 · Put the backend online
- Open a terminal in the
source/firebasefolderof the download. - Sign in to Firebase
A browser window opens; choose the same Google account. You should see: "Success! Logged in as …".firebase login - Choose your project
Pick your project from the list with the arrow keys and Enter, then typefirebase use --adddefaultas the alias. - Install the backend's packages
This takes a minute or two. Warnings are normal; it should end without "ERR!".cd functions npm ci cd .. - Deploy
If it asks to enable an API (Cloud Functions, Cloud Build, Cloud Scheduler, Artifact Registry), answer yes. The first deploy can take 5 to 10 minutes. You should see: "Deploy complete!".firebase deploy --only firestore:rules,firestore:indexes,functions - Test it in your browserOpen this address, with your project id:
You should see a short text that starts withhttps://us-central1-<your-project-id>.cloudfunctions.net/api/v1/health{"ok":true. This address without/v1/healthis your API address (API_BASE_URL); write it down.
The most common causes are the project not being on Blaze yet, or an API that still needs to be enabled; the message usually names it. See Troubleshooting.
05Part 4 · Create the console's key file (service account)
The operator console needs permission to write the app's settings into your database. Firebase gives that permission as a small key file.
- Download the keyFirebase console → the gear icon → Project settings → Service accounts tab → Generate new private key → confirm. A
.jsonfile downloads. - Store it safelyMove it to a folder outside the download, for example
Documents/keys/my-tracker-service-account.json. Anyone with this file can read and change your whole database: never e-mail it, never put it in the app, never upload it to git. - Note its full pathMac: right-click the file while holding Option → Copy as Pathname. Windows: Shift + right-click → Copy as path (remove the quotes).
This file has the permissions it needs as Firebase creates it. If you later run the console on Google Cloud Run without a key file, see Service account and permissions.
06Part 5 · Start the operator console
- Open a terminal in
source/adminand install its packages:npm ci - Make a secret key
You should see a line of 64 letters and digits. This key encrypts the API keys you will store in the console. Save it in your password manager: without it, stored keys cannot be read.node -e "console.log(require('crypto').randomBytes(32).toString('hex'))" - Create the settings fileCopy
.env.examplein theadminfolder to a new file named.env(Mac:cp .env.example .env; Windows:copy .env.example .env). Open.envin a text editor and fill in two lines:
Leave the other lines as they are. Save.ADMIN_SECRET_KEY=<the 64 characters from the step above> GOOGLE_APPLICATION_CREDENTIALS=<the full path to your key file> - Start it
You should see a setup code (four groups of four characters) and the linenpm start[admin] Cryptocurrency Tracker console http://localhost:8790/admin. Also look for[admin] config/public + config/private v1 written: that means the console reached your database. If you seeconfig sync failedinstead, read the message and go to Service account and permissions. Keep this terminal open while you use the console. - Create your owner accountOpen
http://localhost:8790/adminin your browser. Enter the setup code, your e-mail and a password of at least 12 characters.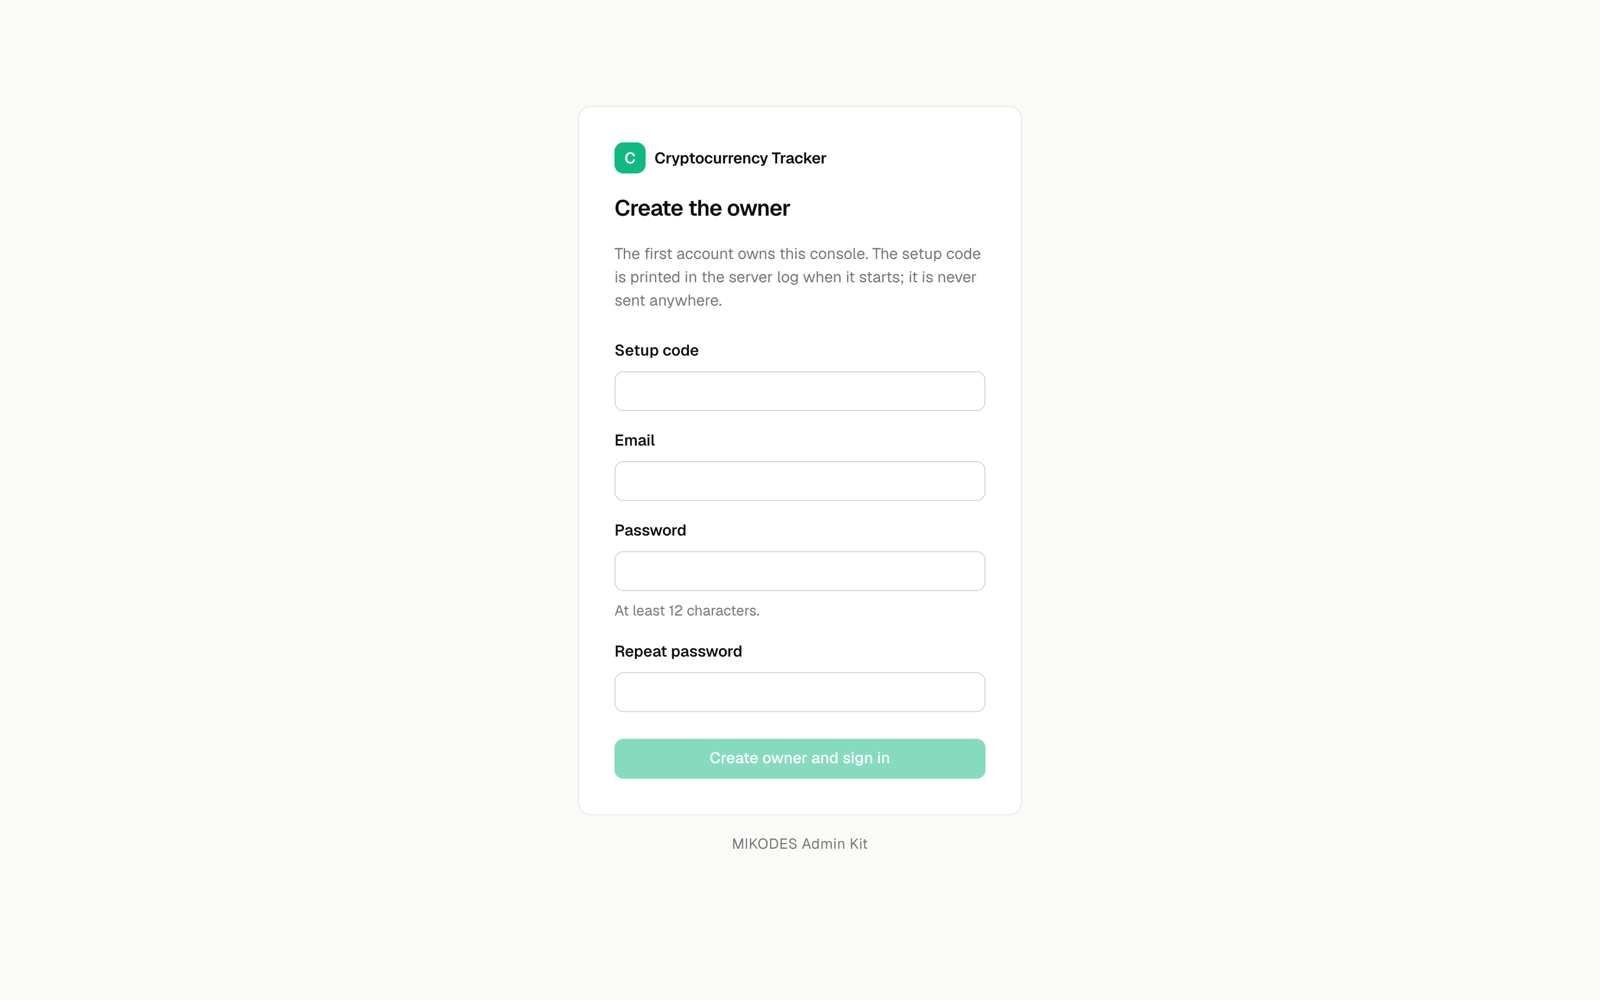
Create the owner · first start only
07Part 6 · First settings in the console
- Get startedThe console opens a short checklist: the product name shown in the app, your accent colour and a support e-mail. Press Finish setup when done.
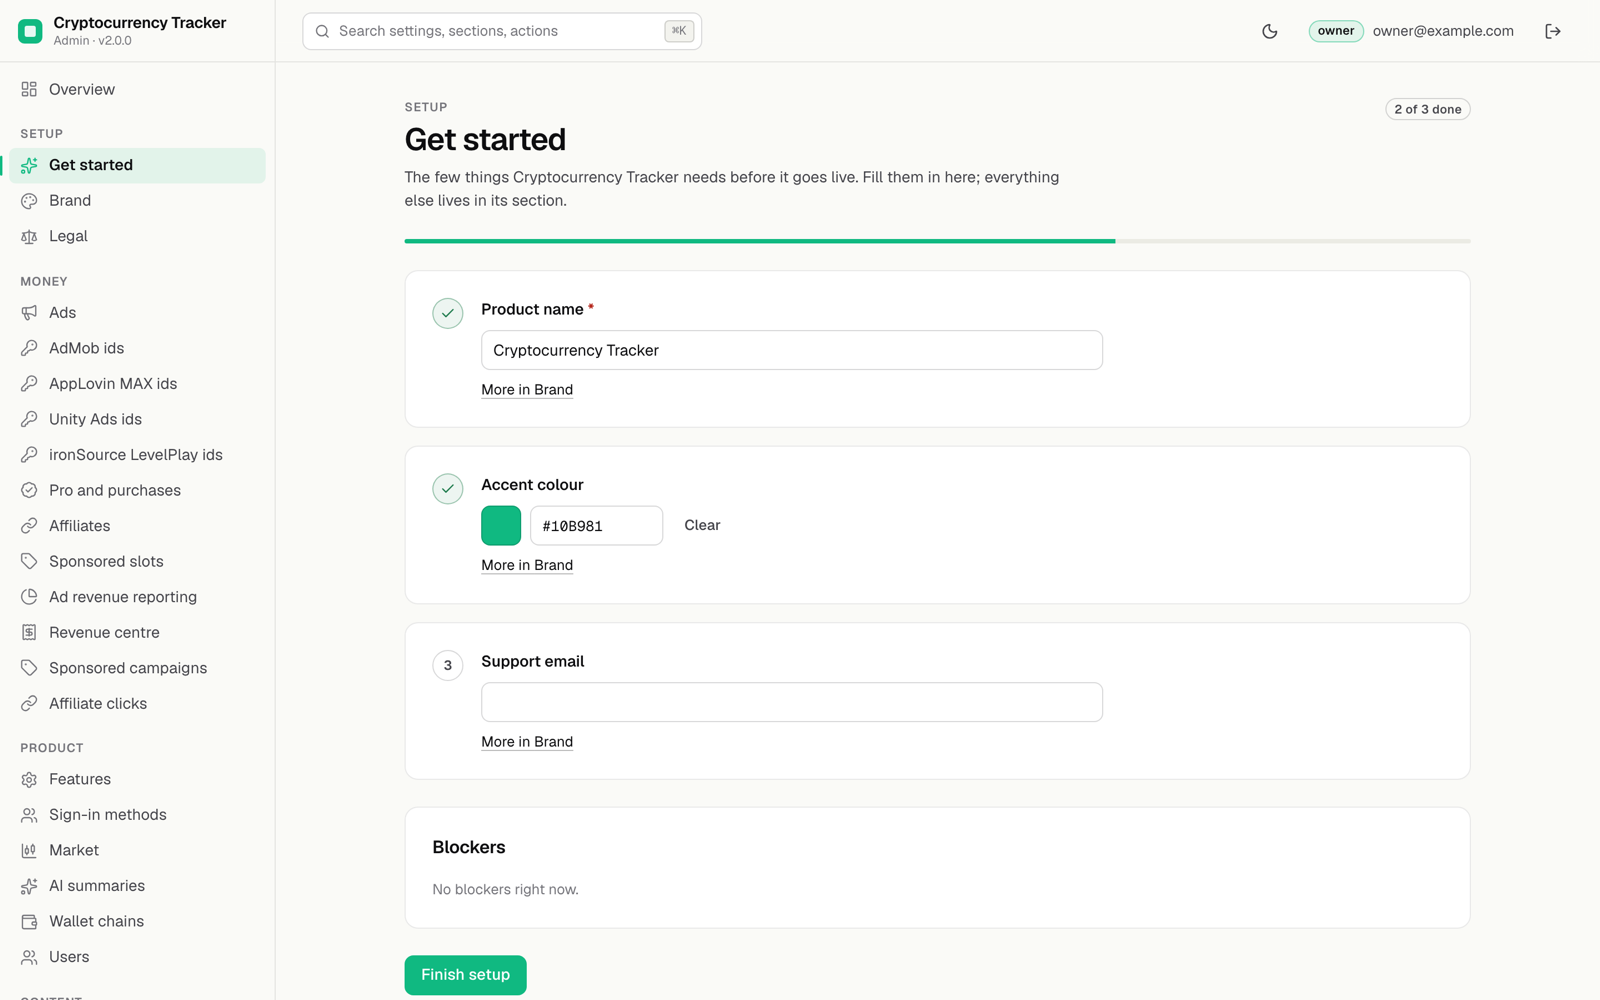
Get started · local console with sample data - LegalLeft menu → Legal: enter the web addresses of your privacy policy and terms. The stores require them.
- Data providersCreate a free Demo key at CoinGecko, then Left menu → Data providers: set the CoinGecko plan to Demo, paste the key and press Test. You should see "CoinGecko accepted the demo key (/ping)."
- Check StatusLeft menu → Status. "Firestore is reachable" and "App config written to Firestore" must be green. Anything marked as a blocker tells you what is still missing.
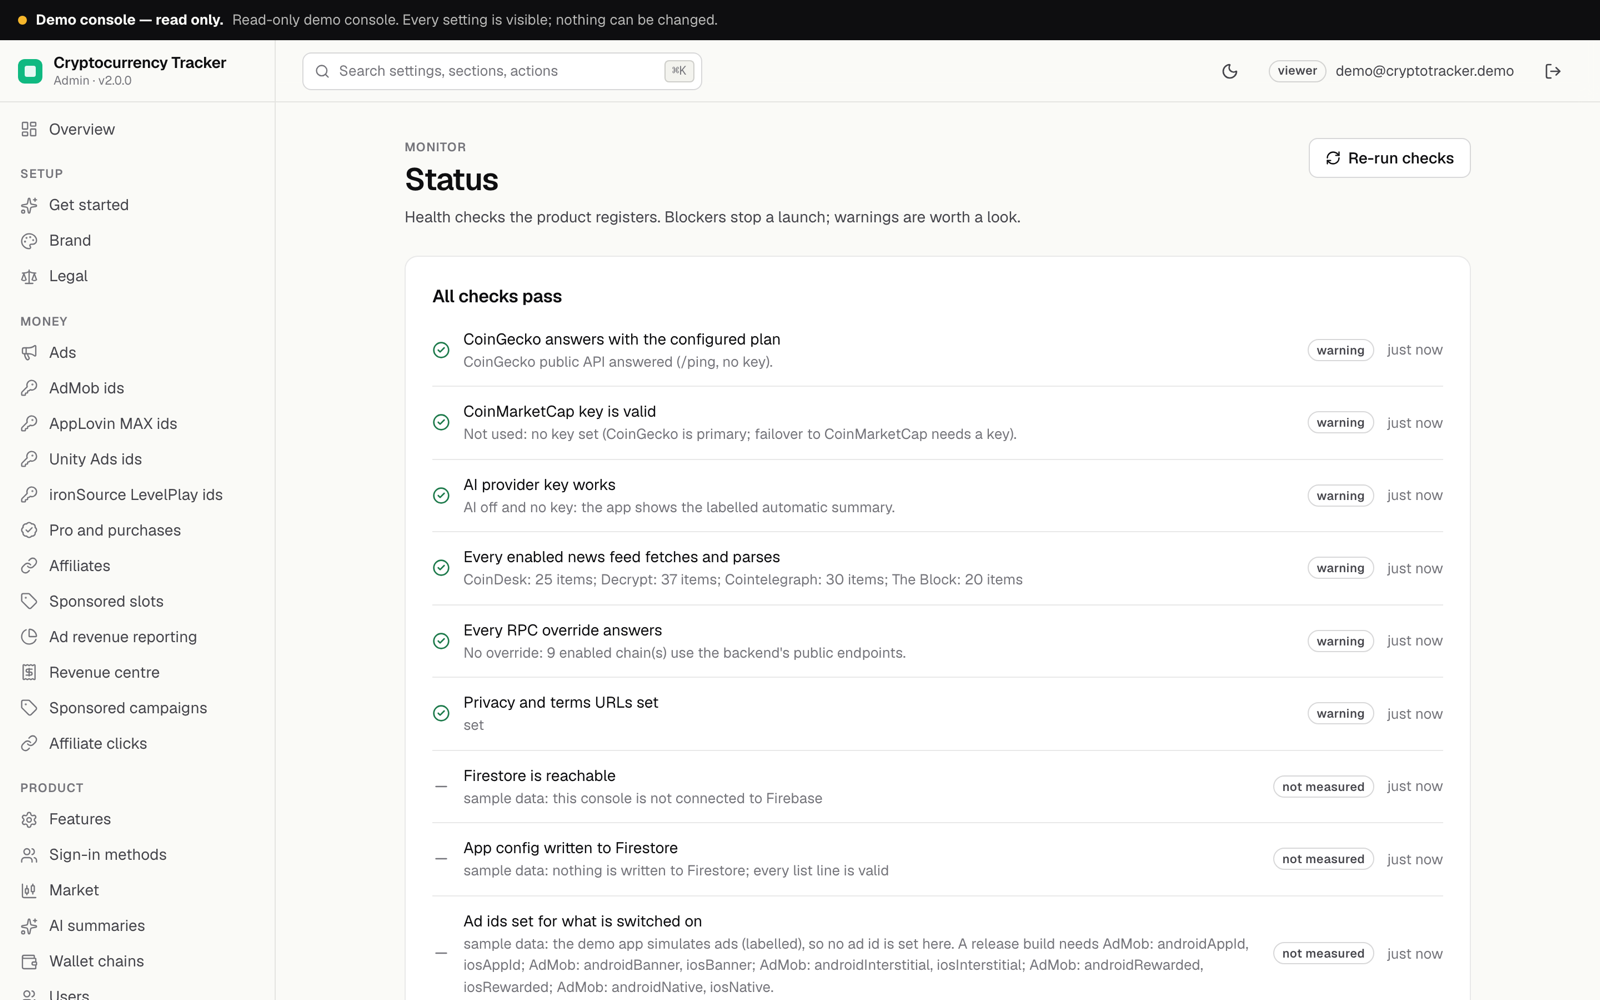
Status · public demo console (sample data, so Firestore shows "not measured") - Leave money settings for laterAds, Pro, affiliates and sponsored slots are off. Switch them on once the app works (How the app earns).
Every page of the console is described in Operator console.
08Part 7 · Build the app and open it on your phone
- Choose your app's ids firstPick your Android application id and iOS bundle id, for example
com.yourname.coinwatch, and set them as in Rebranding. Do this now: it cannot be changed after the first store upload. - Connect the app to your Firebase projectIn a terminal in
source/app:
Choose android and ios with the space bar, then Enter. You should see that it wrotedart pub global activate flutterfire_cli flutterfire configure --project=<your-project-id>lib/firebase_options.dart. - Run it on a phoneConnect an Android phone with USB debugging on (or start an emulator from Android Studio), then:
You should see the onboarding, then live markets. If you see "Set your API address" or "Connect your Firebase project", one of the two steps above is missing.flutter pub get flutter run --dart-define=API_BASE_URL=https://us-central1-<your-project-id>.cloudfunctions.net/api - Change something in the consoleFor example the accent colour under Brand. Close the app completely and open it again: the new colour appears (the app loads its settings when it starts; allow up to a minute).
09Part 8 · Go live
- Put the console onlineSo you can reach it from anywhere, host it on a Node 22 server or container with HTTPS. Copy
.envand the key file there, and back up thedata/folder and yourADMIN_SECRET_KEY. See Deploy options. - Make it yoursName under the icon, icon and colours: Rebranding.
- Release buildsSigning, the Google Play bundle and the App Store build: Release. Before you publish with ads, replace the AdMob test app id (Ads).
- Push on iPhoneUpload your APNs key to Firebase: APNs key.
Stuck? Troubleshooting lists symptoms with their causes and fixes, and Support says how to reach us.